
Okay, I admit it. I’m a gadget guy, and quite frequently, those around me have to suffer through endless conversations about the latest shiny technology that has caught my eye. (Just ask my long-suffering wife, whose patience in my current home automation project is wearing quite thin.) So, you shouldn’t be surprised that, at every weekly production meeting for the past couple months, I’ve tried to schedule a review of the new Power Hub1 from Innovv. Why is it so special? Well, it allows for switched power to be distributed to up to five accessories from one location – which translates into just one switched connection to be spliced into a bike’s wiring harness.
MO Wrenching: How To Properly Splice Wires
Turn On: How To Install Switched Accessory Power To Your Motorcycle
Portable Power: How To Install Powerlet Electrical Sockets
Since I’ve covered the installation of switched accessory power, Powerlet electrical sockets, and proper wire splicing in previous articles, I’m going to focus on what the Innovv Power Hub1 brings to the party. The Power Hub1 allows for the installation of switched power delivery for five accessory circuits of up to 15 amps each (as long as the total doesn’t exceed 40 amps). Additionally, the Hub1 delays the power to the accessories for 10 seconds after the ignition is switched on to allow the starter motor to have access to the full cranking power of the battery – a real boon in low-battery situations.
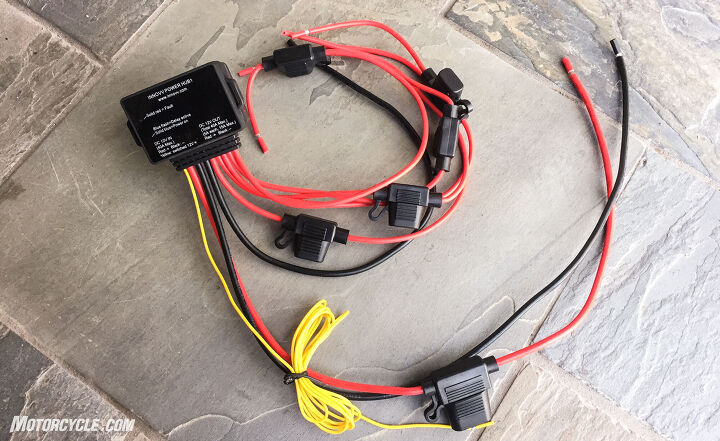
The Power Hub1 is a compact unit that offers flexible power distribution options while tapping into only one wire on your bike’s harness.
The other benefits are a little less obvious on first glance. If you’re only installing one accessory on your motorcycle, splicing into the wiring harness is not a big deal, but if each new accessory requires a new cut to draw power, you increase your chances of electrical problems because of the multiple potential points of failure. With the Power Hub1, only one splice needs to be made. The trade-off is that you will need to run wires from the hub to the location of the accessories.
The Power Hub1 is a 64.2mm x 39mm x 40mm, (2.5” x 1.5” x 1.6”) plastic block that you mount on your bike. The interface consists of two LEDs that signal the hub’s status: solid red for wiring fault, flashing blue for delay mode, and solid blue for active. The hub’s wires are separated into two groups, with the first powering the hub and the second distributing it to the accessories.
While the 12-inch leads offer multiple routing options, the unused ones take up a fair amount of room in a motorcycle’s cramped space.
A pair of 12-gauge wires that get connected to the battery power the hub. The positive lead has a 40-amp fuse already installed. The 22-gauge yellow wire attaches to a switched power source and is used as a trigger for the Power Hub1. The remaining six wires consist of five 16-gauge fused wires and a single 12-gauge negative. While you can simply ground the accessories to the frame, using the common negative wire again reduces the number of locations of points of potential circuit failure.
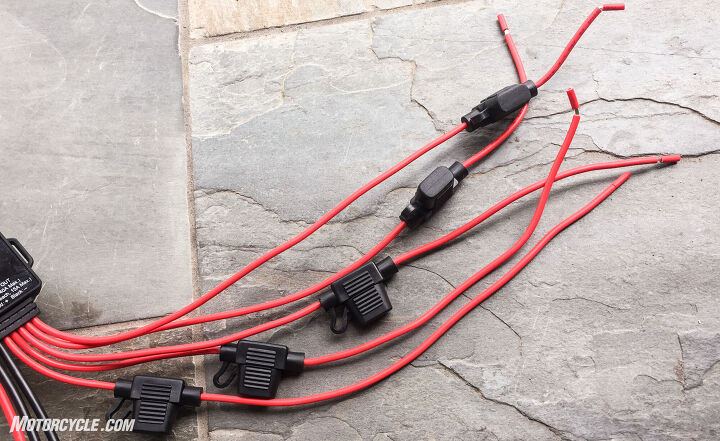
The single complaint I have about the Power Hub1’s construction is the length of the five positive pigtails. While 12-inches is a good length, it takes up a ton of room on a bike – particularly with the fuse holders. I’d prefer to have some sort of connector arrangement to keep the unused pigtails shorter. However, a motivated end-user could fit those individually.
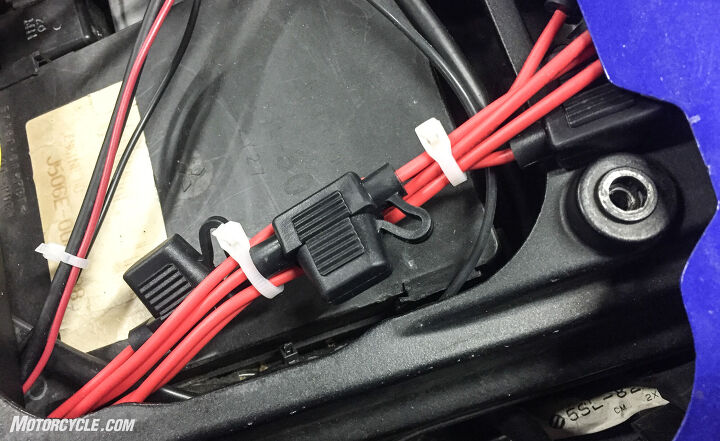
I created my own mini-harness by bundling the accessory leads together and tucking them under the bodywork. Some of the fuses will be harder to access than others, though.
Installation of the Power Hub1 is as easy as making the wire connections and finding a place to mount the hub on the motorcycle. Touring bike owners will find this task easier than sportbike riders. If any single accessory circuit will draw more than 5 amps, you’ll need to add a higher rated fuse (up to 15 amps) to the pigtail. Again, you should be cognizant of the total amperage draw to avoid exceeding the 40-amp limit.
MO Tested: Innovv K1 Motorcycle Camera Review
The Innovv Power Hub1 works exactly like I hoped it would – unobtrusively. It switches on the power to my Innovv K1 dash cam and the accessory socket on my fairing after the aforementioned 10-second delay and switches the accessories off with the ignition. I highly recommend the Power Hub1 for riders who want to install multiple switched accessories to their motorcycles. You can buy the Power Hub1 directly from Innovv’s website for $69. www.Innovv.com
MO Tested: Innovv Power Hub1 appeared first on Motorcycle.com.
【Top 10 Malaysia & Singapore Most Beautiful Girls】Have you follow?
